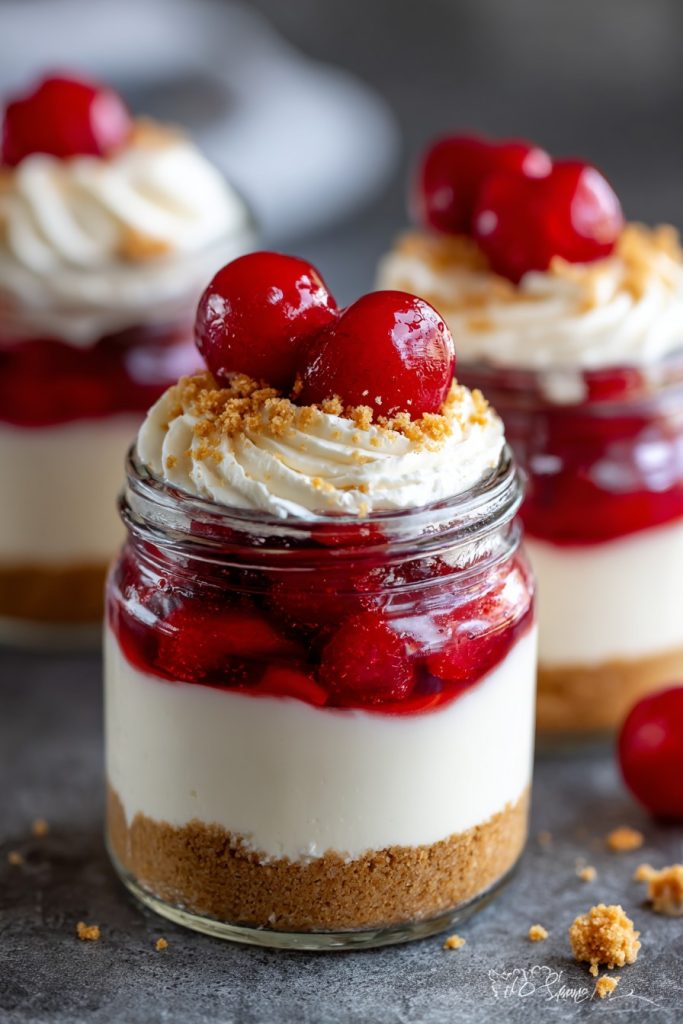
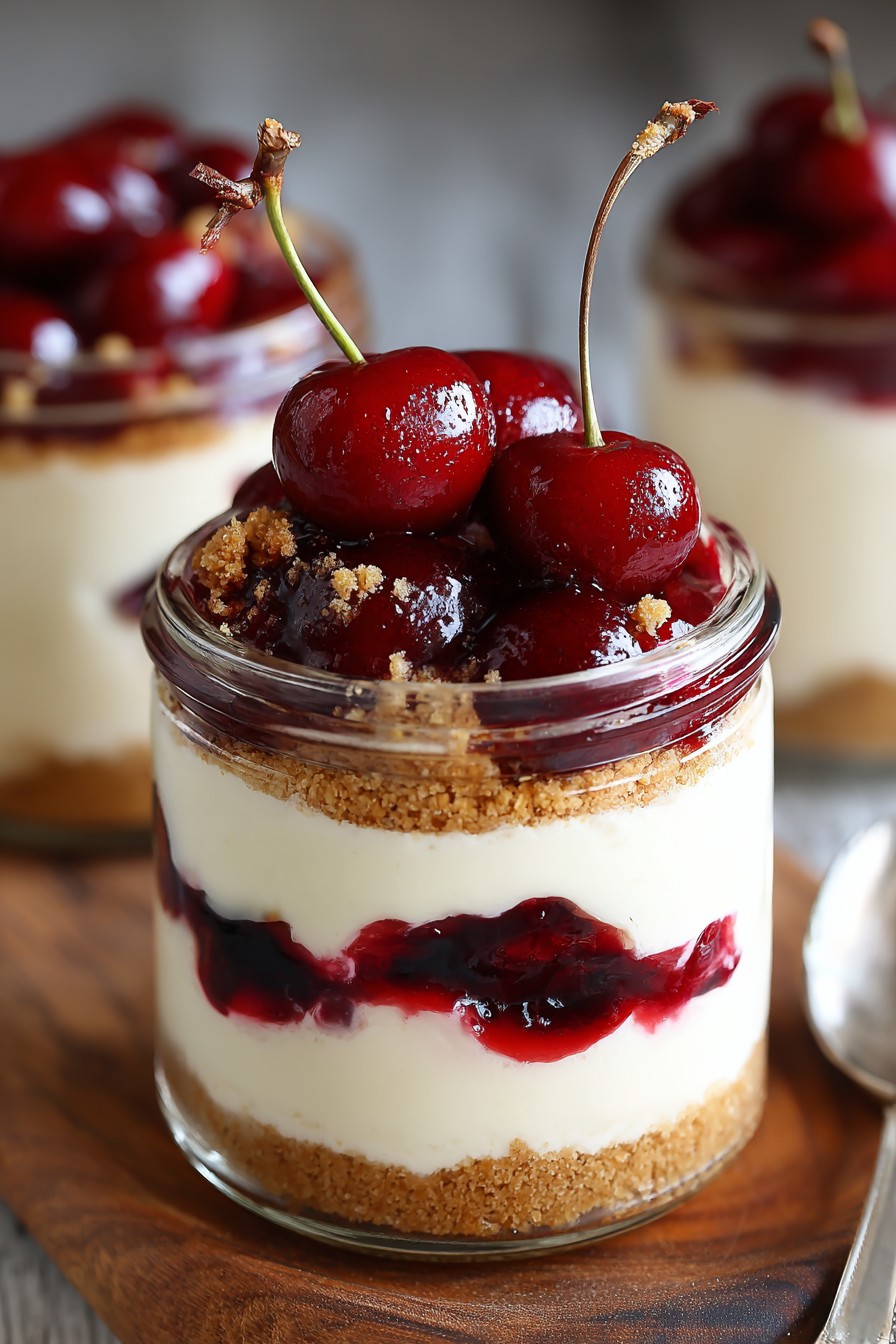
Mmm, who doesn’t love a creamy, dreamy cheesecake? Especially when it’s as easy as tossing ingredients into jars and letting the fridge do all the work. These no-bake cherry cheesecake jars are your ticket to dessert heaven without breaking a sweat.
Why This Recipe Works
- No oven required – perfect for hot summer days or when you’re just too lazy to bake.
- Individual servings mean no fighting over who gets the biggest slice.
- The combination of creamy cheesecake and tart cherry topping is a match made in dessert heaven.
- Customizable to your taste – swap out the cherry topping for whatever fruit or sauce you love.
- Great for make-ahead desserts – prepare them the night before for stress-free entertaining.
Ingredients
- 1 1/2 cups graham cracker crumbs
- 1/4 cup melted butter
- 1 tbsp sugar
- 16 oz cream cheese, softened
- 1/2 cup powdered sugar
- 1 tsp vanilla extract
- 1 cup heavy whipping cream
- 1 can cherry pie filling
Equipment Needed
- Mixing bowls
- Electric mixer
- Spatula
- Measuring cups and spoons
- 4-6 mason jars or dessert glasses
Instructions
Step 1: Prepare the Crust
In a medium bowl, mix together the graham cracker crumbs, melted butter, and sugar until well combined. Press about 2 tablespoons of the mixture into the bottom of each jar, using the back of a spoon to compact it. This will be the base of your cheesecake, so make sure it’s nice and firm.
Step 2: Make the Cheesecake Filling
In a large bowl, beat the softened cream cheese until smooth. Add the powdered sugar and vanilla extract, continuing to beat until fully incorporated. In a separate bowl, whip the heavy cream until stiff peaks form. Gently fold the whipped cream into the cream cheese mixture until smooth and fluffy.
Step 3: Layer the Cheesecake
Spoon the cheesecake filling over the crust in each jar, filling them about two-thirds full. Use the back of a spoon to smooth the top. Then, spoon a generous amount of cherry pie filling over the cheesecake layer. The amount is up to you, but don’t be shy – the more cherries, the better!
Step 4: Chill to Set
Place the jars in the refrigerator for at least 4 hours, or overnight if possible. This allows the cheesecake to set and the flavors to meld together beautifully.
Step 5: Serve and Enjoy
Once set, your no-bake cherry cheesecake jars are ready to serve. Add a dollop of whipped cream on top for an extra touch of decadence, if desired. Grab a spoon and dig in!
Tips and Tricks
For an even more decadent dessert, try adding a layer of chocolate ganache between the crust and the cheesecake filling. Simply melt 1/2 cup of chocolate chips with 1/4 cup of heavy cream, stir until smooth, and spoon a thin layer over the crust before adding the cheesecake filling. If you’re short on time, you can use store-bought whipped cream instead of making your own. Just be sure to add it right before serving to maintain its texture. For a nuttier crust, substitute half of the graham cracker crumbs with finely ground almonds or pecans. This adds a lovely depth of flavor and a bit of crunch.
Recipe Variations
- Swap the cherry pie filling for blueberry, strawberry, or raspberry for a different fruit flavor.
- Add a layer of caramel or chocolate sauce between the crust and the cheesecake filling for a richer dessert.
- Incorporate lemon zest into the cheesecake filling for a bright, citrusy twist.
- Use Oreo cookie crumbs instead of graham cracker crumbs for a chocolatey crust.
- Top with fresh fruit instead of pie filling for a lighter, fresher version.
Frequently Asked Questions
Can I make these cheesecake jars ahead of time? Absolutely! These jars can be made up to 2 days in advance. Just keep them covered in the refrigerator until you’re ready to serve. The crust may soften slightly over time, but they’ll still taste delicious.
Can I use low-fat cream cheese? You can, but the texture and flavor won’t be as rich and creamy. Full-fat cream cheese gives the best results for a decadent cheesecake experience.
How long do these cheesecake jars last in the fridge? They’ll keep for up to 3 days in the refrigerator, though they’re best enjoyed within the first 48 hours for optimal texture.
Summary
These no-bake cherry cheesecake jars are the perfect easy dessert for any occasion. With a creamy cheesecake filling, a crunchy graham cracker crust, and a sweet cherry topping, they’re sure to be a hit. Plus, they’re customizable, make-ahead friendly, and require no baking – what’s not to love?