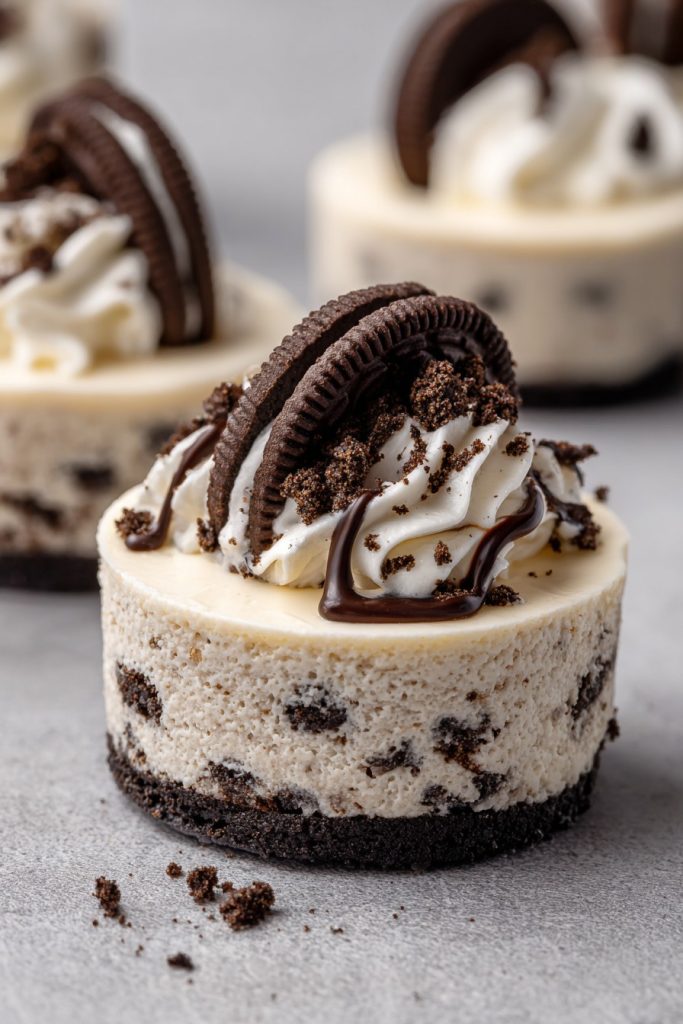
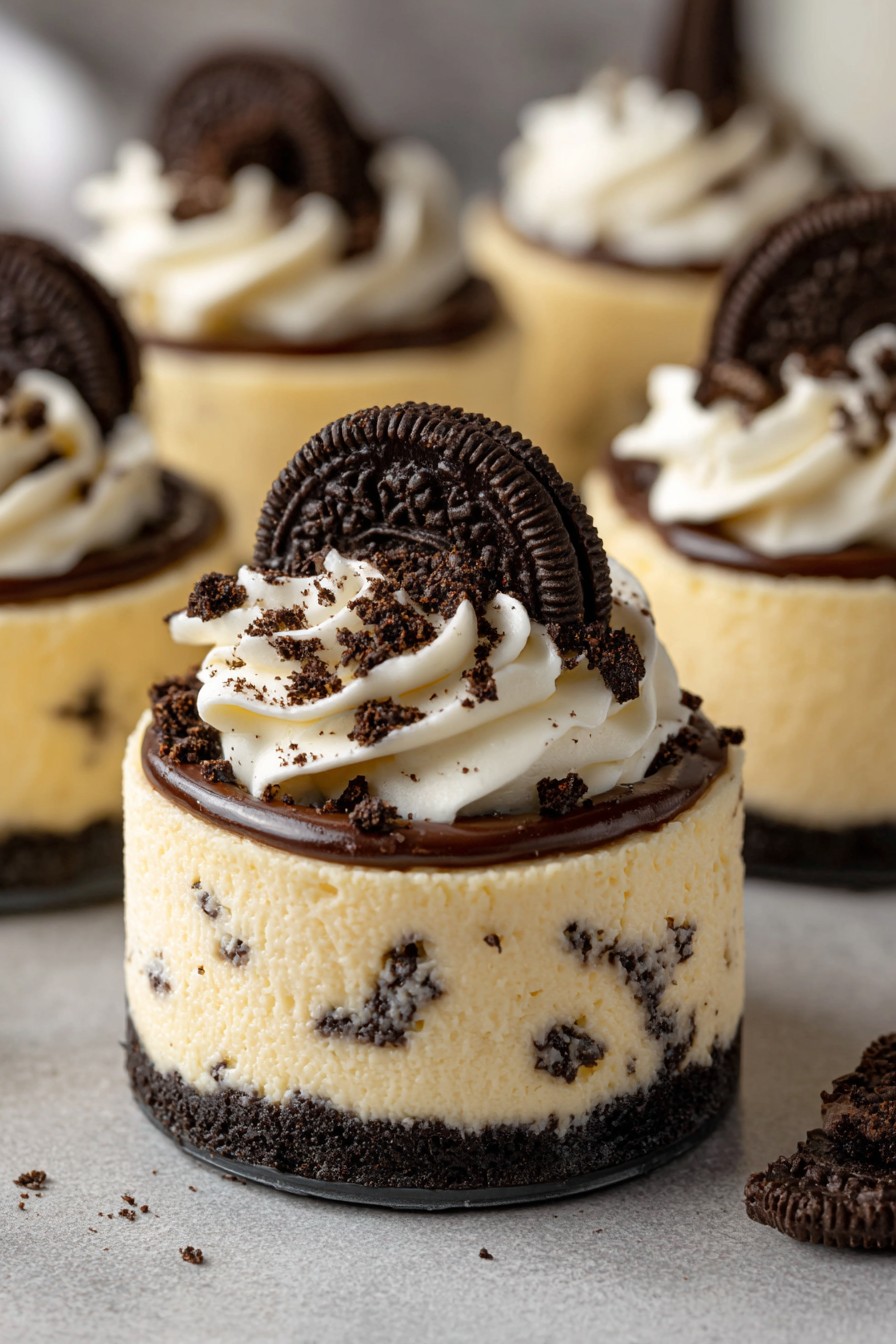
Baking is overrated when you can whip up these no-bake Oreo cheesecakes in no time. Perfect for any occasion, these mini delights are a crowd-pleaser with their creamy texture and crunchy Oreo base.
Why This Recipe Works
- No baking required, making it perfect for hot summer days or when you’re short on time.
- The combination of creamy cheesecake and crunchy Oreo crust is irresistible.
- Mini portions mean you can enjoy guilt-free or share with friends.
- Customizable with various toppings to suit any taste.
- Simple ingredients that are easily accessible at any grocery store.
Ingredients
- 24 Oreo cookies, divided (16 for crust, 8 for filling)
- 2 tbsp unsalted butter, melted
- 8 oz cream cheese, softened
- 1/4 cup granulated sugar
- 1 tsp vanilla extract
- 1 cup heavy whipping cream
- Optional toppings: whipped cream, chocolate sauce, additional Oreo crumbs
Equipment Needed
- 12-cup muffin tin
- Mixing bowls
- Electric mixer
- Spatula
- Measuring cups and spoons
Instructions
Prepare the Oreo Crust
Crush 16 Oreo cookies into fine crumbs using a food processor or a zip-top bag and rolling pin. Mix the crumbs with melted butter until well combined. Press about 1 tablespoon of the mixture into the bottom of each muffin cup liner. Chill in the refrigerator for at least 15 minutes to set.
Make the Cheesecake Filling
In a large bowl, beat the softened cream cheese until smooth. Add sugar and vanilla extract, beating until combined. In another bowl, whip the heavy cream until stiff peaks form. Gently fold the whipped cream into the cream cheese mixture until no streaks remain. Crumble the remaining 8 Oreo cookies and fold into the filling.
Assemble the Cheesecakes
Divide the cheesecake filling evenly among the prepared muffin cups, smoothing the tops with a spatula. For best results, let the cheesecakes chill in the refrigerator for at least 4 hours, or overnight, to set completely.
Add Toppings
Before serving, add your favorite toppings such as whipped cream, chocolate sauce, or additional Oreo crumbs for extra crunch and flavor.
Serve and Enjoy
Carefully remove the cheesecakes from the muffin tin and serve chilled. Enjoy the creamy, crunchy, and utterly delicious mini no-bake Oreo cheesecakes!
Tips and Tricks
For a smoother cheesecake filling, ensure your cream cheese is at room temperature before mixing. If you’re in a hurry, placing the cheesecakes in the freezer for about an hour can speed up the setting process. For a neater presentation, use a piping bag to fill the muffin cups with the cheesecake mixture. Experiment with different Oreo flavors for a unique twist. Always use full-fat cream cheese for the best texture and flavor.
Recipe Variations
- Try using different flavors of Oreos, such as mint or peanut butter, for a unique twist.
- Add a layer of fruit preserves or caramel sauce between the crust and filling for extra flavor.
- Incorporate mini chocolate chips or chopped nuts into the filling for added texture.
- For a lighter version, substitute the heavy whipping cream with whipped coconut cream.
- Top with fresh berries or a drizzle of melted chocolate for a gourmet touch.
Frequently Asked Questions
Can I make these cheesecakes ahead of time?
Absolutely! These mini cheesecakes can be made up to 2 days in advance. Just keep them covered in the refrigerator until you’re ready to serve. They’re the perfect make-ahead dessert for parties or gatherings.
Can I freeze the mini cheesecakes?
Yes, you can freeze them for up to a month. Place them in a single layer in an airtight container, separating layers with parchment paper. Thaw in the refrigerator overnight before serving.
How do I prevent the cheesecakes from sticking to the liners?
Using high-quality non-stick muffin liners or lightly greasing the liners with cooking spray can help prevent sticking. Also, ensure the cheesecakes are fully set before attempting to remove the liners.
Summary
These mini no-bake Oreo cheesecakes are the perfect easy dessert for any occasion. With a creamy filling and crunchy Oreo crust, they’re sure to be a hit. Plus, they’re customizable with endless topping options. Give them a try for a delicious treat that requires no oven time!