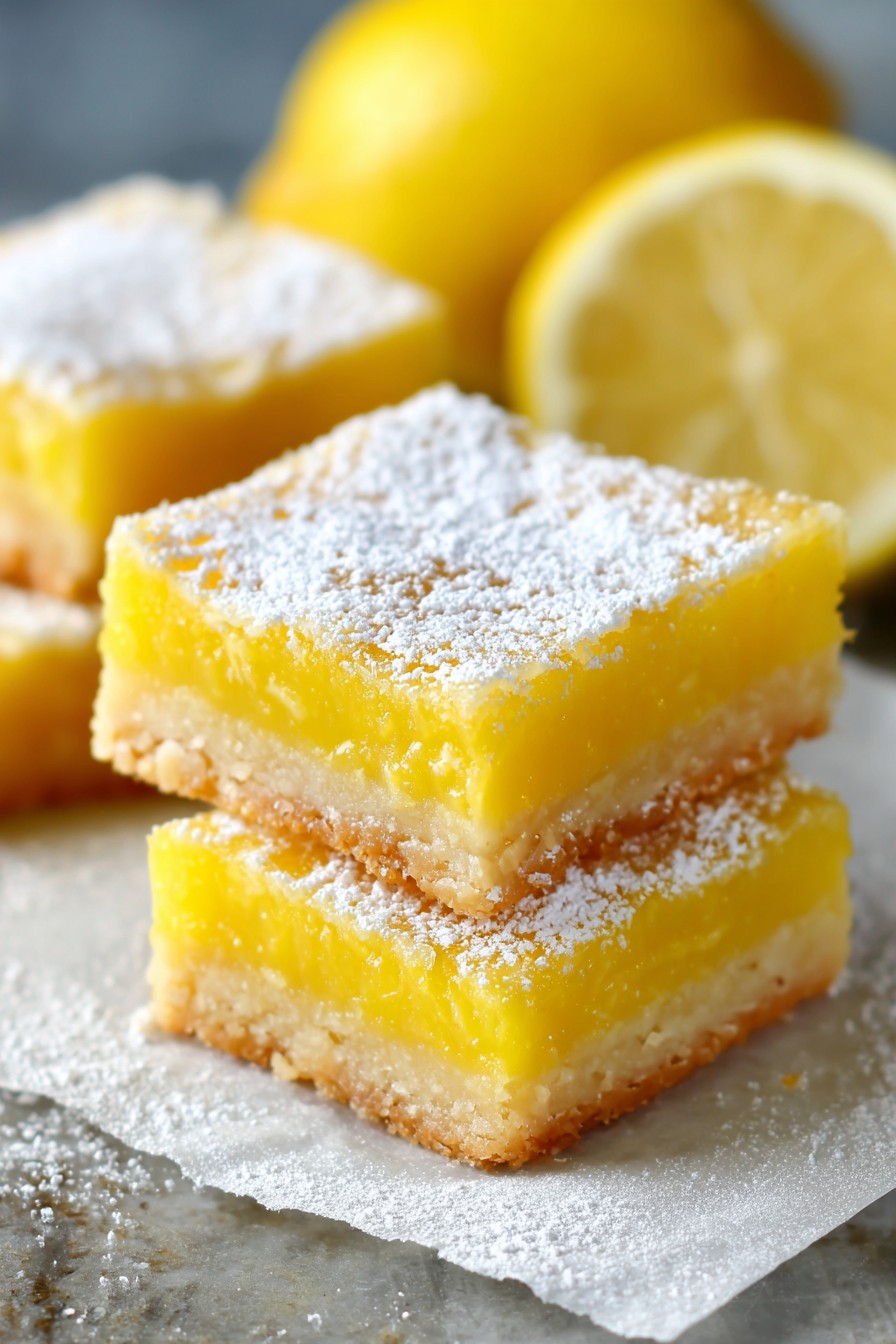
Delight in the perfect balance of sweet and tart with these irresistible lemon bars. Whether you’re a seasoned baker or a newbie in the kitchen, this recipe promises a foolproof path to dessert heaven.
Why This Recipe Works
- The buttery shortbread crust provides a crisp contrast to the creamy lemon filling.
- Fresh lemon juice and zest ensure a vibrant, natural flavor that’s far superior to artificial alternatives.
- Pre-baking the crust prevents sogginess, guaranteeing the perfect texture in every bite.
- A dusting of powdered sugar adds a sweet finish that complements the tangy lemon perfectly.
Ingredients
- 1 cup unsalted butter, softened
- 1/2 cup granulated sugar
- 2 cups all-purpose flour
- 4 large eggs
- 1 1/2 cups granulated sugar
- 1/4 cup all-purpose flour
- 2/3 cup fresh lemon juice
- 1 tablespoon lemon zest
- Powdered sugar, for dusting
Equipment Needed
- 9×13 inch baking pan
- Mixing bowls
- Electric mixer
- Whisk
- Measuring cups and spoons
- Zester
- Juicer
Instructions
Preheat and Prep
Preheat your oven to 350°F and line your baking pan with parchment paper, leaving an overhang on the sides for easy removal. This little trick saves you from a sticky situation later.
Make the Crust
In a large bowl, cream together the softened butter and 1/2 cup sugar until light and fluffy. Gradually mix in 2 cups flour until the dough comes together. Press evenly into the prepared pan and bake for 20 minutes, or until lightly golden. This step is your foundation—get it right, and you’re golden.
Whisk Up the Filling
While the crust bakes, whisk together the eggs, 1 1/2 cups sugar, 1/4 cup flour, lemon juice, and zest until smooth. Pour over the hot crust as soon as it comes out of the oven. The residual heat helps the filling set beautifully.
Bake to Perfection
Return the pan to the oven and bake for another 25 minutes, or until the filling is set and the edges are slightly golden. A slight jiggle in the center is okay—it’ll firm up as it cools.
Cool and Serve
Allow the bars to cool completely in the pan on a wire rack. Once cooled, lift out using the parchment overhang, dust with powdered sugar, and cut into squares. Patience is key here; rushing can lead to a less-than-perfect presentation.
Tips and Tricks
For an extra zesty kick, increase the lemon zest to 2 tablespoons. If you’re short on time, you can use bottled lemon juice, but fresh is always best for flavor. To ensure clean cuts, chill the bars before slicing and wipe your knife between cuts. For a decorative touch, use a stencil when dusting with powdered sugar. Remember, the quality of your ingredients can make or break this recipe—splurge on good butter and fresh lemons.
Recipe Variations
- Add a layer of raspberry jam between the crust and filling for a fruity twist.
- Swap half the lemon juice with lime juice for a citrus duo that’s doubly delicious.
- Incorporate a tablespoon of poppy seeds into the filling for a subtle crunch and visual appeal.
- Top with a thin layer of white chocolate ganache for a decadent finish.
- Use a gluten-free flour blend for the crust to cater to dietary restrictions.
Frequently Asked Questions
Can I make these bars ahead of time?
Absolutely! These lemon bars can be made up to 2 days in advance. Just store them in an airtight container in the refrigerator and dust with powdered sugar before serving. They also freeze well for up to a month—just thaw overnight in the fridge.
Why did my filling turn out runny?
A runny filling usually means it wasn’t baked long enough. The filling should be set with only a slight jiggle in the center when you take it out of the oven. If it’s still too loose, pop it back in for another 5-10 minutes and check again.
Can I use bottled lemon juice?
While bottled lemon juice is convenient, it lacks the fresh, vibrant flavor of freshly squeezed juice. For the best results, stick with fresh lemons. Plus, you’ll need the zest anyway, so you might as well juice them too!
Summary
These zesty lemon bars are the perfect blend of sweet and tart, with a buttery crust and creamy filling that’s sure to impress. Follow our tips for the best results, and don’t be afraid to experiment with the variations. Happy baking!