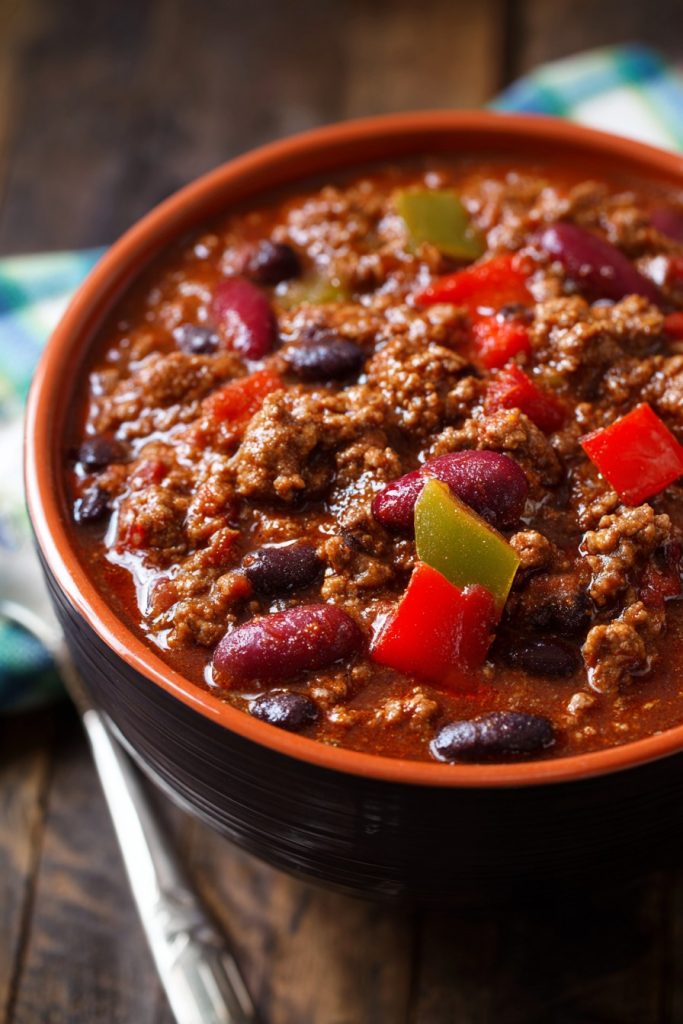
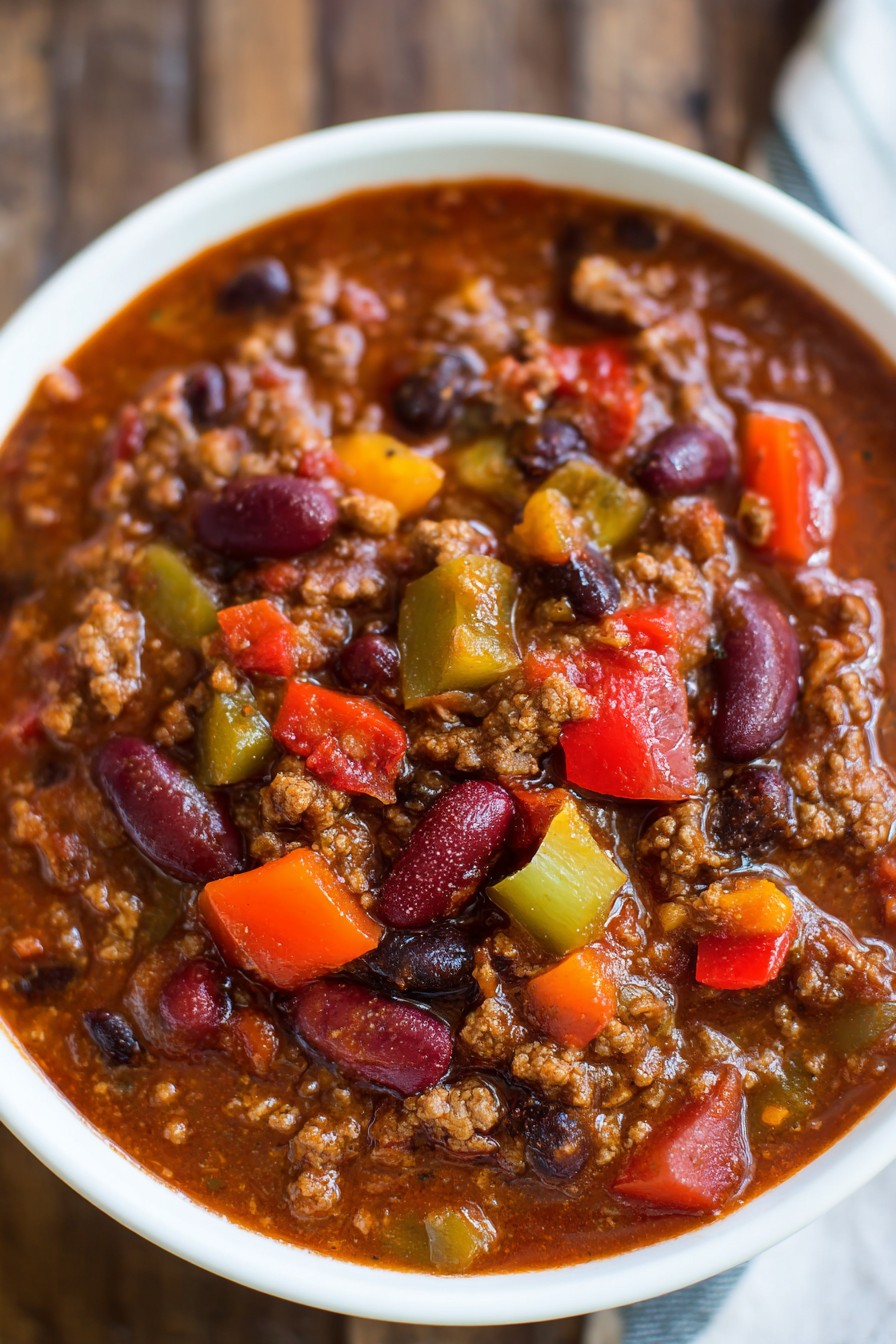
Nothing beats the warmth and comfort of a hearty bowl of chili, especially when it’s made in a fraction of the time thanks to your Instant Pot. This recipe is all about delivering deep flavors and tender textures without the long simmer, making it perfect for busy weeknights or last-minute gatherings.
Why This Recipe Works
- The Instant Pot locks in flavors and tenderizes the meat in record time, giving you a chili that tastes like it’s been simmering all day.
- Using a blend of spices and a touch of cocoa powder adds depth and complexity to the flavor profile.
- The addition of beans and tomatoes not only boosts the nutritional value but also creates a satisfying texture that’s both hearty and comforting.
Ingredients
- 1 lb ground beef
- 1 onion, diced
- 3 cloves garlic, minced
- 1 bell pepper, diced
- 1 can (15 oz) kidney beans, drained and rinsed
- 1 can (15 oz) black beans, drained and rinsed
- 1 can (28 oz) crushed tomatoes
- 2 tbsp chili powder
- 1 tsp cumin
- 1 tsp cocoa powder
- 1 cup beef broth
- Salt and pepper to taste
Equipment Needed
- Instant Pot
- Measuring cups and spoons
- Wooden spoon
- Knife and cutting board
Instructions
Step 1: Sauté the Aromatics
Set your Instant Pot to the sauté function and add the ground beef. Cook until browned, about 5 minutes, then add the onion, garlic, and bell pepper. Sauté for another 3 minutes until the vegetables start to soften. Tip: Don’t rush this step; browning the meat and sautéing the veggies builds a flavor foundation.
Step 2: Add the Spices
Sprinkle in the chili powder, cumin, and cocoa powder, stirring to coat the meat and vegetables evenly. Cook for about 1 minute until fragrant. This toasts the spices, unlocking their full potential.
Step 3: Incorporate the Liquids and Beans
Pour in the crushed tomatoes and beef broth, then stir in the kidney and black beans. Give everything a good mix to combine. Tip: For a thicker chili, you can reduce the amount of beef broth.
Step 4: Pressure Cook
Secure the lid on your Instant Pot and set the valve to sealing. Cook on high pressure for 15 minutes, then allow a natural release for 10 minutes before quick releasing any remaining pressure.
Step 5: Season and Serve
Once the pressure is fully released, open the lid and give the chili a stir. Taste and adjust the seasoning with salt and pepper as needed. Serve hot with your favorite toppings.
Tips and Tricks
For an even richer flavor, consider browning the meat in batches to avoid overcrowding the pot. If you’re short on time, you can use frozen diced onions and peppers. For a smokier flavor, add a chipotle pepper in adobo sauce. Remember, the chili will thicken as it cools, so don’t worry if it seems a bit thin right after cooking.
Recipe Variations
- Swap the ground beef for ground turkey or chicken for a lighter version.
- Add sweet potatoes or butternut squash for a sweet and hearty twist.
- For a vegetarian option, omit the meat and double up on the beans or add lentils.
- Spice lovers can amp up the heat with additional chili powder or diced jalapeños.
Frequently Asked Questions
Can I make this chili without an Instant Pot?
Absolutely! While the Instant Pot speeds up the cooking process, you can adapt this recipe for the stovetop. Simply brown the meat and sauté the veggies in a large pot, then add the remaining ingredients and simmer for about 30-40 minutes, stirring occasionally.
How can I store leftovers?
This chili stores beautifully in the refrigerator for up to 4 days or in the freezer for up to 3 months. Just be sure to cool it completely before transferring to airtight containers.
Can I use dried beans instead of canned?
Yes, but you’ll need to adjust the cooking time. Soak the beans overnight, then add them to the pot with the other ingredients and increase the pressure cooking time to 25 minutes.
Summary
This Instant Pot chili is a game-changer for anyone craving a comforting, flavorful meal without the wait. With simple ingredients and minimal prep, it’s a foolproof recipe that’s sure to become a staple in your kitchen.